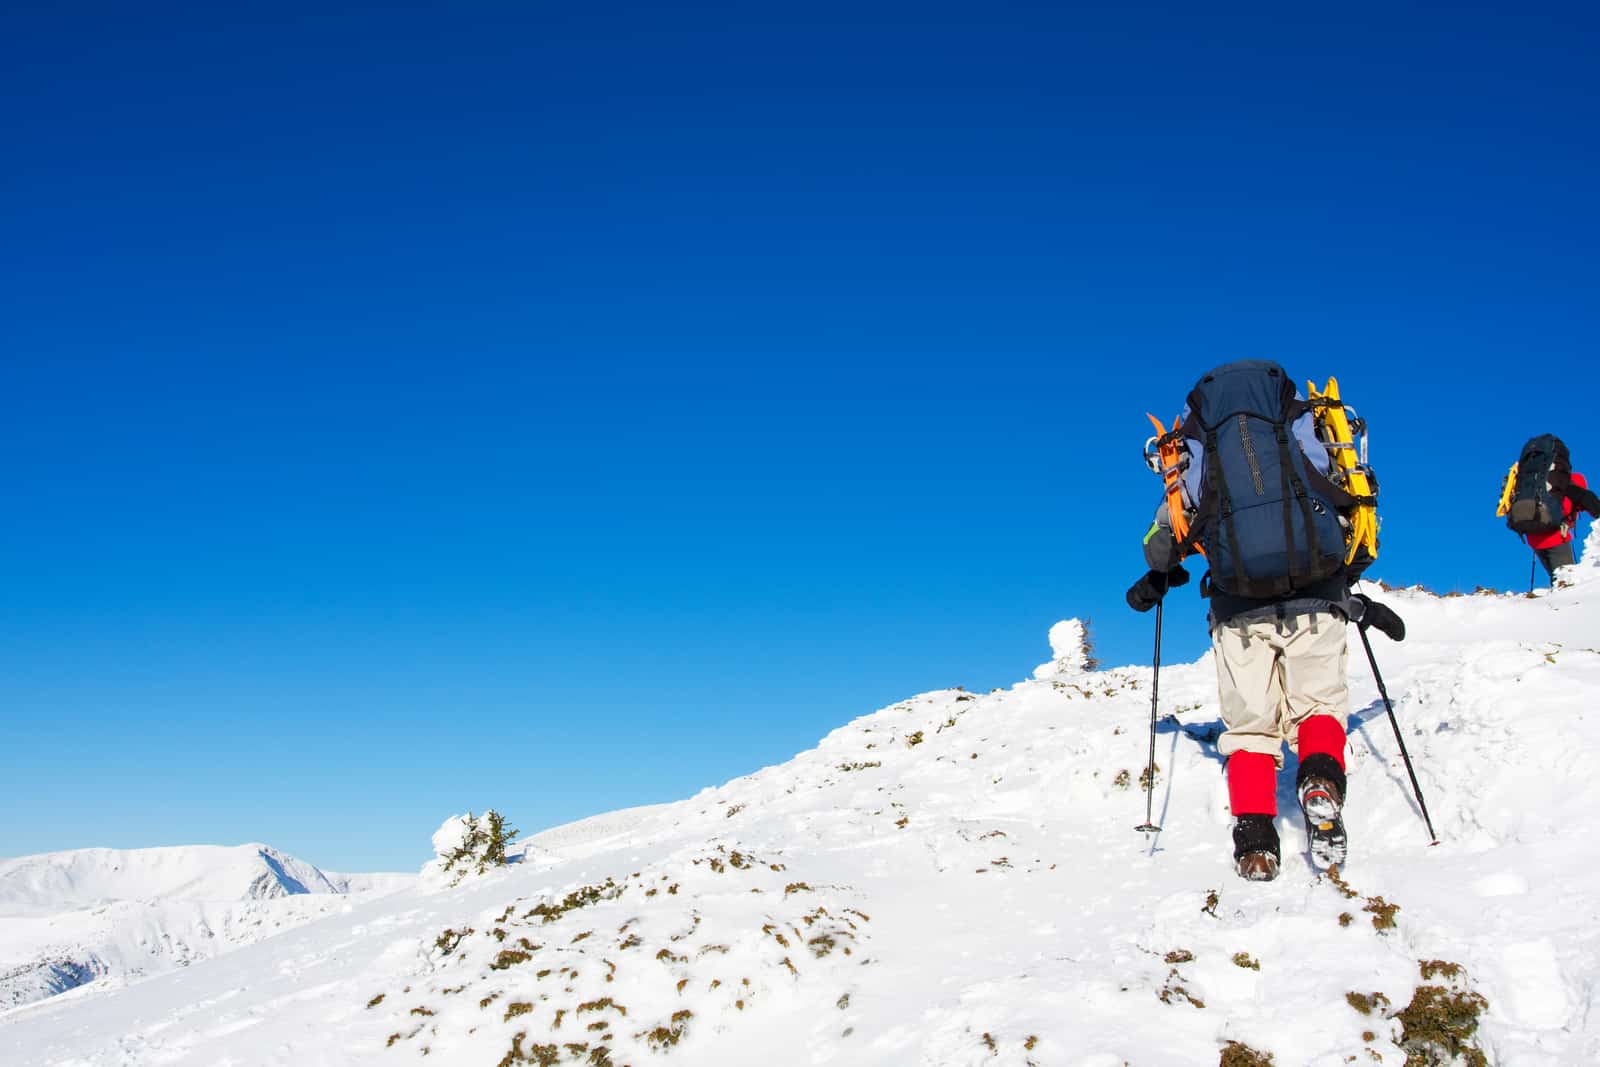
You like the outdoors, camping and hiking. You’ve always wondered what it would feel like to stand on top of a mountain, looking down at the terrain you had to cross to get to the top. Then you decided to knuckle up, bite down hard and tackle your first mountain.
So, where to start? What does it take to climb a mountain? In this guide, I aim to cover the basics that you need to know in order to successfully summit your first mountain, from preparation and training to actually being on the mountain, including skills you should master, gear you might need and technique to keep in mind. I will also take a brief look at post-trek things you should consider.
Contents
Before The Climb
“Mountain” is actually an incredibly broad term, covering anything from a gentle slope at low altitude and mild weather, to crazy difficult terrain where you need to scramble over loose rocks on hands and knees, scale shear ice cliffs and use oxygen in extreme conditions. The length of your trip could also vary greatly, from a morning hike to a multi-day or multi-week trek.
When you’re starting out, it’s a good idea to get the hang of things and try the sport on easy, shorter routes until you figure out whether or not you actually like mountaineering. Many an aspiring mountaineer started out on a trip that was way too rough for their level of experience and it scared them off the sport for good, before they even had a chance to see the awesomeness of it.
For longer treks on technical and difficult routes, you need some serious gear. Hold off on purchasing gear when you’re just starting out. Gear is expensive and could burn a hole in your budget in no time.
Also, you’ll probably end up buying stuff you don’t need or of a type that just won’t work for you. Take things slow and buy gear as and when needed. You’ll figure out what works for you and catch tips from your climbing buddies as you go along.
Terminology
This one can be confusing. The terms “mountaineering” and “mountain climbing” are often used interchangeably, but they’re not the same thing.
Mountaineering means walking up a mountain. Don’t be fooled by how easy that sounds. Some mountains are incredibly tough and, even though the routes aren’t technical, you still need hair on your teeth to push through. Mountaineering is usually done on snow-free peaks at lower altitudes where you don’t need Alpinist knowledge.
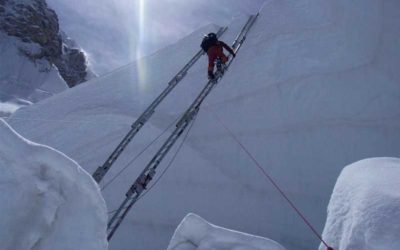
Mountain climbing refers to highly technical routes with many obstacles that requires special gear to cross. You’ll probably have to scramble on your hands and knees, use a rope or some other gear and have special skills or assistance in order to summit. Sometimes, you’ll find special chains or ladders permanently installed on the routes to help you along. In Italy, they call these Ferrata-routes, while the Germans dubbed it Eisen-weg.
Gear
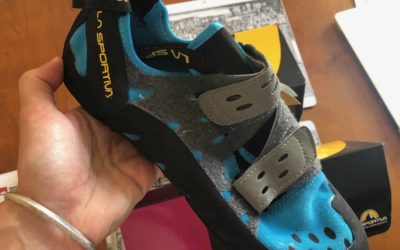
Boots
The essential thing you definitely need, no matter what, is a decent pair of hiking boots. These can be pretty expensive, but if you make a smart purchase and take good care of your boots, they will last you a couple of years and keep your feet safe along the way. Think about it. Mountaineering requires you to walk a lot. Caring for your feet is non-negotiable. It’s important that your boots are comfortable and that they support your ankles, since this would minimize sprains. Comfortable boots minimize blisters, which could put a serious damper on an otherwise glorious trek.
Waterproof Pants & Jacket
Waterproof jacket and pants will also stand you in good stead. The weather in the mountains is completely unpredictable and your odds of getting soaked, even in the dry season, are high. The right jacket and pants will keep you dry and comfortable enough on short trips.
Backpack
The above will probably be enough for when you’re just starting out and figuring out whether you actually like mountaineering. At this time, you’re probably doing day trips in smaller peaks or gentler slopes. Once you get the hang of this, you’ll start doing longer treks on more difficult terrain.
When that time comes, you will need a proper backpack. The size of your pack will depend on the length of your trip and your physical size. If you’re a tiny person, a 70-liter pack will be way too big for you to comfortably carry. Filling that one up with gear means it will definitely be bigger than you are and probably heavier too. Not the best idea. Conversely, if you’re a big guy, brushing the ceiling with your hair by just existing, you’ll easily carry a large pack filled with gear and food.
On shorter trips, you need a smaller pack, while on longer trips, you need a bigger pack. If you need to lug a ton of gear along for overnighting, rock climbing and rappelling, you will also need a bigger pack.
The type of pack you choose would depend on your personal preferences. Your pack must be comfortable and suit the gear you want to take with. The pack you choose would also affect how you pack that gear.
It’s a good idea to check out what the other guys are using and how they optimize the size of the pack and the gear they use, before you go and spend a fortune on a new pack that won’t work for you.
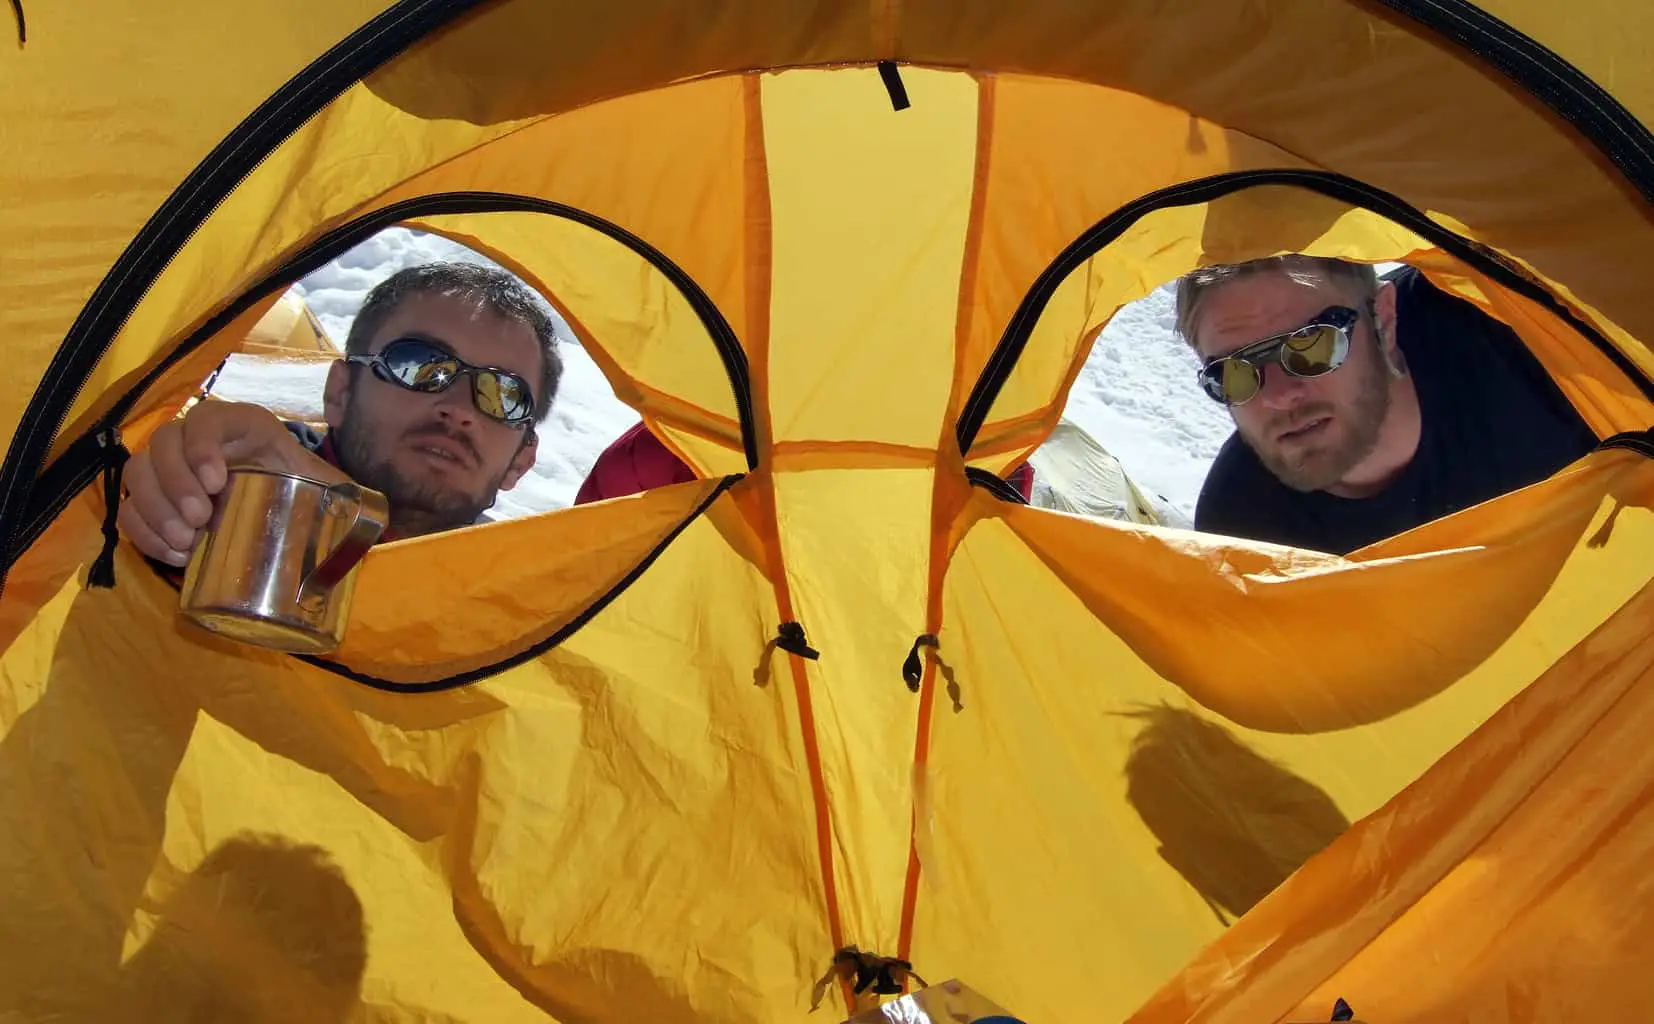
Tent
On multi-day trips you probably need a tent. It’s best to take a lightweight tent that’s easy to set up and take down. You want to minimize the weight you carry and the time needed to set up and set down camp. I can write a whole new article on tents, so suffice to say that it should be practical, lightweight and suited to your purpose.
Cooking Utensils
For a day hike, you don’t need any cooking utensils. On a two-day hike, you might still be able to get by with pre-cooked, packaged food. If you’re aiming to be out for longer than that, you’ll definitely need some cooking utensils.
These will vary greatly, depending on your personal preferences, the terrain you’re crossing and the amount of stuff you’re willing to carry.
Basics include a small gas canister, or the means with which to start a fire (safely, of course), such as firelighters and matches. You’ll also need a small pot, a mug or coffee and some cutlery. You can go high-tech and gadgety, getting a spork (spoon and fork combination) and a really cool multi-tool that includes a knife, such as a Leatherman, or you can go old-school and take a proper knife, fork and spoon.
Whatever floats your boat and makes your life easy. Some guys who are serious about their morning coffee even take an espresso hand-press. Again, it all depends on you as a person and what you’re willing to carry with you.
Choosing a Home Base & Destination
Before starting out, you need to pick a home base and a destination. For shorter trips in well-travelled areas, like the Alps, you’ll probably find well-equipped cabins at a relatively high altitude. This allows you to stay in comfortable lodgings while going out on day trips or staying out for one night at a time with minimum gear.
Start out as high as you can to shorten the climb and maximize your odds at success. After all, you’re wanting to achieve something with your climb, right? This could be a successful summit, finishing a route or whatever else you set as a goal for yourself. If you start out too low, you’ll have to climb for a very long time in order to achieve anything.
You should also take into account the amount of time you have available. If you only have a few days to climb, don’t waste them on slogging routes that aren’t scenic. Pick your base camp, destination and timing such that you make the most of your available time.
Timing
Mountain weather is unpredictable at the best of times. Make sure to read up on the mountain you’re aiming to summit. Pick a season when the weather is generally more favorable and pay attention to the weather forecast. Sometimes, you only get a few hours before a storm rolls in. Getting trapped on the mountain in foul weather is not fun and often not safe, so avoid that if you can.
Preparation
Preparation is an important key to a successful trip. This encompasses so much, including training, reading up, planning your route and getting all your gear sorted.
It’s important to start small, taking on easy routes at low altitudes at first, before taking on the big guns like Mont Blanc and Mount Everest. There’s no shame in starting on the “kiddies’ slopes” until you get the hang of the fitness, skills and gear you need in order to conquer greatness.
Bear in mind that, even though mountaineering is one of the most rewarding sports you could ever try, it’s also one of the most dangerous. The mountain is not your friend – you should treat it with respect. There are good reasons why some medical aid options won’t cover you if you get hurt in the mountains. Proper preparation is essential.
Fitness & Training
If you want to be a mountaineer, you should be fit. While there are various exercise regimes you could follow to get fit, it’s important to listen to your body, push when needed and take it slow when you need to. Your training regime should ramp up, increasing in intensity and frequency, as you’re getting closer to your departure date.
Cardio
On the mountain, you’ll walk for very long stretches at a time, carrying a pack that could vary from a light day pack to a heavy trek pack.
For this, you need stamina. Cardio is a good place to start, increasing your lung capacity and endurance. Running, rowing and cycling are all options for cardio. Incorporating trail running or mountain biking will get you outside while getting fit. This is great, since you want to be outside in the mountains in any case.
Strength Training
Weight training is another essential part of your workout. Use small weights with many reps for endurance training, and larger weights with few reps for strength training. You could also do mountain climbers and stairs with weights. More strength training options include push-ups, pull-ups and squats.
Remember that you need your whole body to be strong, not just your legs. When you do exercises specifically aimed at your legs, like squats or lunges, make sure that you balance it with something aimed at your upper body to maintain full body strength.
Outside is Best
The best training remains being outside. Your body needs to get used to the uneven terrain of the outdoors.
Nearing the Departure Date
Before you take on a mountain, be sure that you can comfortably walk up a steep slope for a few miles with a full pack. It’s a good idea to ramp up your training schedule as the big day draws near, training up to six days a week. Alternate strength and endurance training.
Be honest with yourself about your fitness levels (or lack thereof). Take on things that are within reach and you push yourself a little bit. Don’t bite off more than you can chew. The rest of your crew will not thank you if they have to carry you down the mountain because you overexerted yourself and got hurt as a result.
Reading Up
You should know what you’re in for before you depart. Take time to study a good mountain guide for the area you’re going, understanding the terrain, weather and any other factors that could influence how and when you hike.
Knowing what’s in store for you would also tell you whether or not you need specific gear for your trip and, if so, what. If you’re not clued up and experienced in using that specific gear, it might be a good idea to put off that trip until you know how to tackle this. It would suck big time if you get to a specific point on your trek, only to realize that you can’t overcome the next obstacle, causing you to turn back. What a bummer! Also, taking on things that you’re not experienced enough for can be incredibly dangerous.
An option to overcome this type of difficulty is to hire a guide. These guys know their way around the mountain and the gear and have experience in getting inexperienced people through tricky parts of the route. If you’re lucky, you’d hit it off with the guide and make a new friend.
On the Mountain
Now that you’re properly prepped, you need to take on the mountain. Here are some things to take into account.
Waterproofing
You’ll probably get wet in a million different ways for many different reasons, including river crossings, rain, falling in a puddle or, rookie error, letting your water bottle leak all over your pack. Keeping your stuff dry is important, so make sure to waterproof your pack. Place everything in separate zip seal bags, keeping your dry clothes dry and separate from your dirty clothes and food. A good waterproof cover for your pack could also come in handy.
Food: Dense and Pre-cooked?
When out in the mountains, you need easy food that you can eat while walking. This should also be high in energy and protein and nutrient dense, enabling you to maintain your energy levels without carrying bulky packets of food along.
Pre-cooked food is a great option, but often expensive. Think pre-cooked tuna sachets, which are often flavored and actually quite tasty. You could also take nuts, trail mix and jerky. These don’t weigh much and won’t spoil along the way. Fresh fruit and meat will definitely spoil if you’re out in the sun or going for more than one day.
On multi-day trips, you need food that’s easy to prepare. Remember that you have to carry your food and the means to prepare it with you unless you’re in an area where you can safely and easily light a fire.
Your food should also be quick to prepare since you don’t want to waste precious sleeping time on cooking. Keep in mind that the boiling point of water drops when you’re at high altitudes, so that potato that you’re planning to cook, might never cook properly.
Water and the problem of carrying
Water is essential. There’s no way you can carry enough water with you to last through a multi-day trek, so knowing your water purification options is important. I could write a whole new article on the options available to you, so I won’t go into depth here.
Understand the options that are available to you along with the pros and cons of each. Test out your water purification at home, ensuring that you understand it well and, in the case of chemical purification (like when using water purification tablets), that you’re not allergic to it.
Stretching
Warm up your muscles before you start. This will minimize the risk of injuries and make your trip so much better. Dynamic stretching is a great technique to use.
Safety
Safety is an incredibly important consideration. Mountains are fraught with danger in many forms. These could range from mildly annoying, like insect bites and the normal bumps and bruises, to deadly, like avalanches, rock falls and encountering dangerous animals or poisonous reptiles.
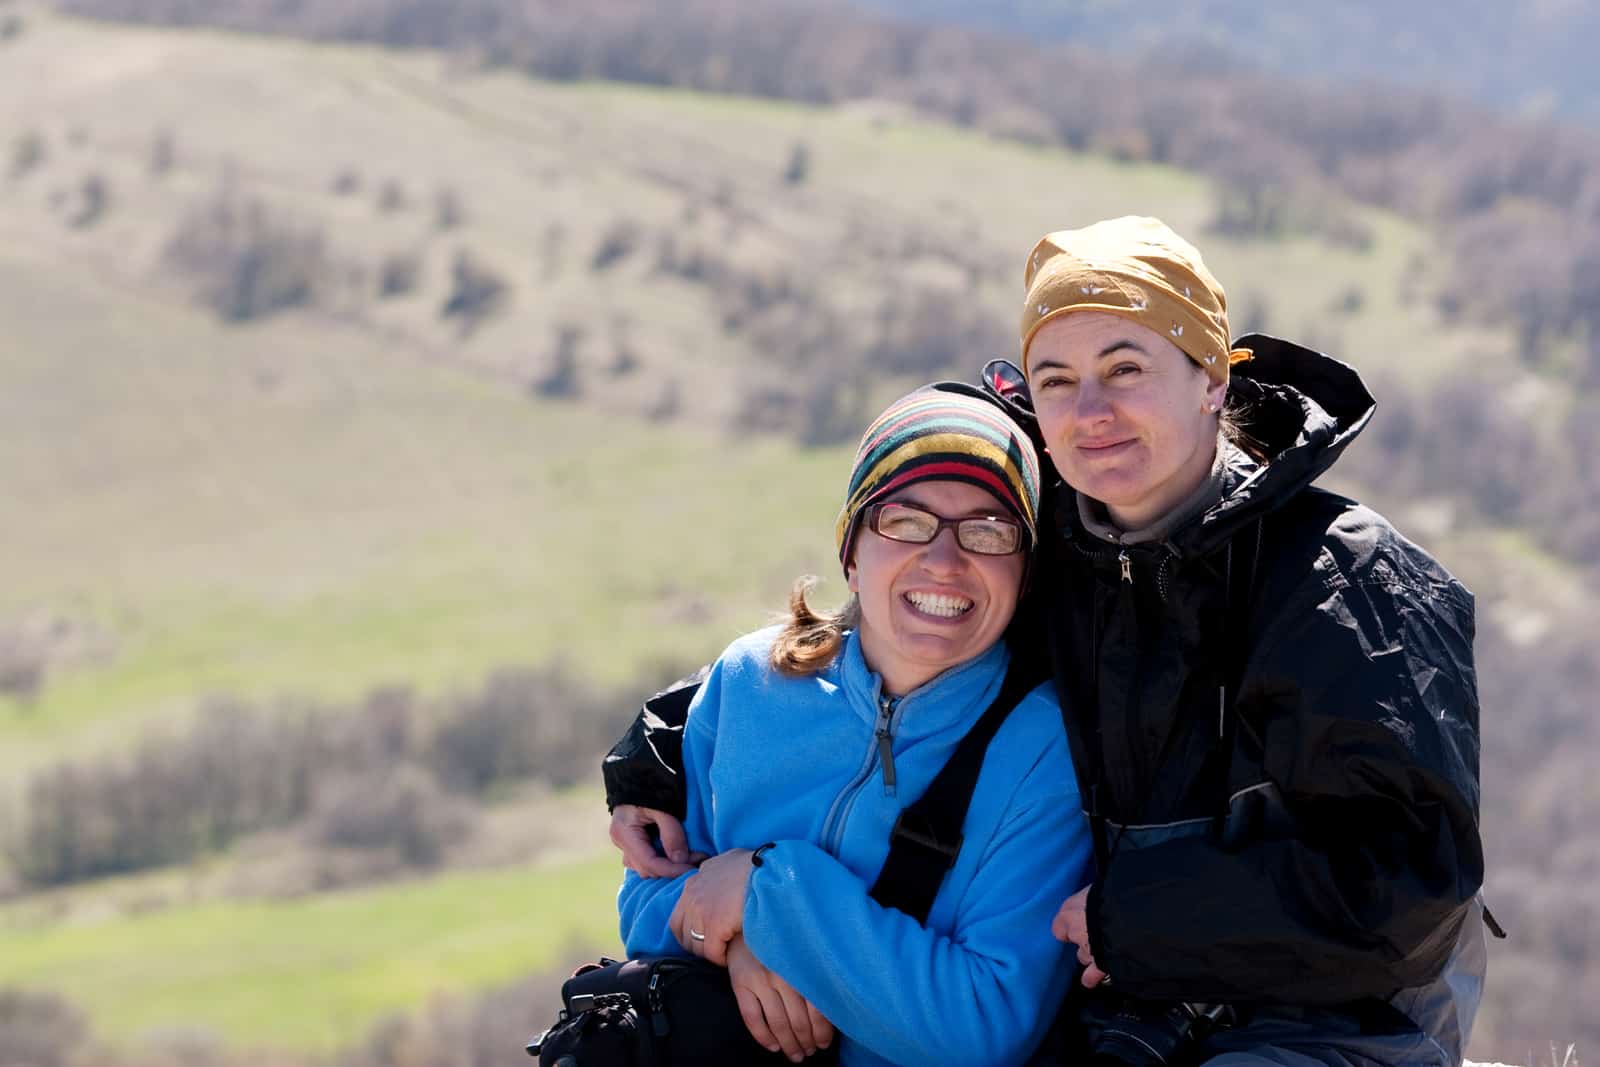
Don’t Hike Alone
Always bring a buddy. It’s true that there’s safety in numbers. If anything happens to you, your buddy can help you out of a tight spot or at least go get help if he can’t get to you. An added bonus is that you now have company and someone who can motivate you to push through tough section of the route.
First Aid
Make sure that at least one person in your team knows basic first aid and that everyone else knows their way around band aid and antiseptic.
Common injuries you’re likely to encounter in the mountains include insect bites, blisters, sunburn, upset stomachs and sprains. It’s usually the ankles that get sprained, but you never know. Having the correct treatment available when these things happen is essential. It makes things a lot easier to deal with. For this reason, you should always carry a small, basic first aid kit.
If one of your crew has an upset stomach or a sprained ankle, you’ll have to camp out until he’s better. It’s a bummer, but no one can hike in that condition.
In the event of broken bones, which can easily happen if someone has a bad fall, you might have to call the mountain rescue squad. If you’re in an area where there’s no reception, this means that someone will have to hike to an area with reception and make the call.
Know the Dangers
Before embarking on a trek, you should know which dangers you’re likely to encounter. Here, a good mountaineering guide book on the area you’re planning to visit usually does the trick. Don’t always trust the internet, since some resources are misleading. Prepare for these dangers as best you can, understanding the risk involved and knowing how to deal with the consequences.
For example, if you’re entering an area inhabited by brown bears and grizzly bears, know the difference between the two, how they’re likely to react and how to handle things when you do encounter one.
The same goes for areas prone to rock falls and avalanches. Here, picking the right season and understanding what an avalanche window is (it’s the window of time just after an avalanche when it’s unlikely to encounter another one) and how to make good use of it.
Also know how to handle an avalanche shovel and what to do in the event that you do get caught in an avalanche.
Tell People Where You’re Going
When you start out on your trip, inform that local mountain rescue teams of your trip, the route you’re planning to take, how long you’re planning to trek and the number of people in your team. When you’re done, let them know that you’re done. This way, if anything goes wrong, someone knows where to start looking for you.
The local mountain rescue teams usually know the area very well, so it’s also a good idea to check with them whether the route you’re planning on taking, is passable at that time of year.
Maps and Navigation
Before you go, you need to understand the route that you’ll take. This will help you prepare properly, knowing which gear you’ll need, how tough the terrain is and how long you’re likely to take on the route. It’s also good to be able to navigate using a map and compass, just in case your GPS battery runs flat.
It’s important to stay on the route. If you wander away from the route, you run the risk of getting lost or falling down a ravine that you didn’t see before it’s too late. Also, if anything does go wrong and a search-and-rescue team need to come find you, they’ll have a hard time knowing where to start if you’re not on the route.
Hygiene & Housekeeping
Hygiene and housekeeping is important for your health and for protecting the environment. Most of the points mentioned below are logical, but they’re often forgotten, so I’ll take the time to mention them again.
Taking a bath in the wild
You’ll get sweaty and dirty and there’s no way around that. When you handle your food with dirty hands, you can pick up some nasty germs. Those sweaty, muddy creases around your neck, under your armpits, between your toes and in the nether regions are areas where you tend to chafe, leading to the formation of raw patches that are prime breeding ground for nasties you’d rather not meet. These could be rather painful too.
Keeping yourself reasonably clean will help you feel better at the end of a tough day and will keep you healthier in the long run. Take waterless hand sanitizer to clean your hands before meals and take some biodegradable soap for the rest of your body. I know that you probably can’t have a proper shower, but a wet cloth with some soap will do wonders, I promise.
Brush Your Teeth
Do I need to elaborate?
Clean You Eating Utensils
Clean your eating utensils before and after each meal. You can clean most of the debris off your pots, pans and eating utensils with some leaves (don’t pick them up at ground level, since these probably have some mountaineer pee on them). Boil some water, stick it in your pot with the leaves and stir things around with a spoon.
If you’re using unfiltered water, be sure to boil everything properly before using it again to kill off any bacteria that’s still lurking around.
Going to the Bathroom
When you have to answer nature’s call, be responsible about it. Go some way off the trail and away from water sources. You don’t want to pollute these and you definitely don’t want to leave anything where someone else might step in it.
Dig a small hole and cover it again when you’re done. Toilet paper or wet wipes (whichever you choose to use), should go with you. Place it in a small zip seal bag so it stays hygienic.
Don’t Litter
If you’re on a long trek and you need to wash your clothes, use biodegradable soap and a plastic bag. This is the method that has the smallest impact on the environment while still getting your clothes reasonably clean.
Anything you brought with you should leave with you. It’s that simple. This includes food wrappers, toilet paper, wet wipes and anything else that could spoil the area for the animals, locals and other hikers.
Making Noise
Just. Don’t.
You’re out in nature to enjoy the peace and quiet, not to take your boom box with you and have a fat party. Making excessive amount of noise ruins it for other people also hiking in the area and could aggravate any dangerous wild animals in the area.
Also, if you’re making a lot of noise, you won’t be able to hear things that could warn you of approaching danger, like a rock fall or flash flood.
Skills (Basic & Technical)
The skills you need to summit will vary greatly depending on the mountain and route you choose and the season in which you’re taking it on. Usually, you’ll choose an easier mountain at lower altitude for your first proper expedition, but maybe you’re an accomplished rock climber and up for a route that requires you to scale sheer cliffs on the way. In this section, we’re not going into all the details – we’re just giving an overview of the skills you might need.
Hiking
This is the most basic skill you need. Surely, most people can walk, right? Walking up a mountain is a little different from your basic stroll in the park, though. Here, it’s important to walk at a steady pace. Pick a pace that’s comfortable for you and that you can keep up for a good few hours.
Walking at a steady pace is key. If you’re constantly altering your pace, going slower and faster, you’ll tire much more quickly than you would if you keep your pace steady. This is where all the endurance training you did will pay off.
Focus on how you’re placing your feet on the ground. Walking mindfully will improve your balance and decrease the risk of getting sprains or slipping and stumbling.
Another thing to focus on is breathing. Sounds simple enough, right? Ensure that you breathe deeply and that the rhythm of your breathing matches your pace. This will increase your endurance.
Rock Climbing/Rappelling
You might need to scale some cliffs on more technical routes. Rock climbing up a cliff on a mountain climbing expedition isn’t all that common, while having to rappel down a cliff is a bit more common.
If you do end up having to rock climb of rappel on your trek, make sure that you have the proper gear and that you do this safely. Before embarking on your expedition, you should get proper training in both of these and ensure that you understand the risks involved.
Using Crampons
Crampons are used when trekking on packed snow or ice. These are “soles” with sharp spikes that you strap onto the bottom of your boots, enabling you to get some grip on the otherwise slippery and dangerous ice slopes.
You won’t use crampons for your entire journey; you only need it for the parts that have ice or snow. This means you’ll have to pack your crampons properly and safely so that they won’t get lost along the way or damage the rest of your gear or gauge a hole in your arm.
When putting on your crampons, you also need proper technique. It’s tempting to sit down when you do this, but it’s not the best idea. Sitting down will get your bum wet (you’re on snow, after all) and, on slippery slopes, could lead to you sliding uncontrollably. Not the best idea. Rather place your crampons on the ground, facing up the slope, and step into them one at a time, fastening them properly. Also get a buddy to check that they’re fastened correctly, since your buddy can see all the way around your feet.
Walking with crampons is different from normal hiking. Using the correct technique will feel strange at first, but will ensure your safety and conserve your energy in the long run. Always place the crampon in such a way that the entire “sole” is in contact with the ice. This way, all the claws get a good grip on the ice, giving you stability and peace of mind.
There are different techniques for walking up or down a slope with crampons. It’s a good idea to check out some tutorials prepared by reputable mountaineers and also going with someone who’s experienced. They’ll give you good tips and guide you to use the gear properly.
Acclimatization
When climbing at high altitudes, you run the risk of contracting altitude related sicknesses. Your odds of contracting these remain the same, whether you’re fit and healthy or ill and unfit and regardless of whether you’re used to being at high altitudes. The only thing that can increase your chances of avoiding altitude sickness is acclimatization. Here, you gradually increase the altitude at which you spend your night, giving your body time to adjust to the decreased air pressure and resulting lower oxygen intake.
If you don’t take sufficient time to acclimatize, you could get seriously ill. If not treated in time, altitude sickness is deadly. The most effective treatment for altitude sickness is going to a lower altitude as quickly as you can. In most cases, this sorts out all symptoms without needing any further treatment.
Oxygen
At extreme altitudes (more than 8000 meters above sea level), the amount of oxygen you take in with each breath is about a third of what you would get at sea level. Here, you run the risk of blacking out due to lack of oxygen. Mountaineers climbing at such extreme altitudes use oxygen canisters. These contain special oxygen-enriched air, giving you the amount of oxygen per breath that you’re used to at sea level. Using oxygen at high altitudes enables you to function somewhat normally, despite the extreme weather and harsh conditions you’re likely to face.
I don’t recommend tackling a mountain high enough to require oxygen canisters on your first summit. However, if you do decide to take on one of these extreme summits, be sure that you know how to use the oxygen canister and the gear that goes with it. This includes masks, tubing and regulators. Also be sure that you understand the technique involved in climbing with these.
Returning Home
When you’ve successfully reached the summit, your trip is not over. It’s important to stay as focused on the way down as you did on the way up. Usually, the way down a mountain is slightly easier than the way up, but you can’t always bank on this. When walking down steep slopes, you run the risk of ankle sprains and knee injuries if you’re not focused on using proper technique.
I think it’s a human fallacy. We are so determined to get to the top that we simply forget that we have to get down as well. Perhaps people don’t know, but most fatalities in extreme mountaineering happen on the way down. The horrendous K2 disaster in 2008 is a prime example of this.
The other dangers of the mountain remain exactly the same as on the way up: dangerous animals, poisonous reptiles, serious falls, rock falls, avalanches, getting stuck in extreme weather and getting lost.
Don’t let the trip home spoil your awesome victory after summiting. Be mindful of how you’re traveling, focusing on the same things you did on your way up. Even if you didn’t reach your goal, use the trip back to base camp to reflect on what you achieved and what you learned. Enjoy the beauty of the mountain, the company of your team and the awesomeness of nature. After all, being outside, away from civilization, is one of the main things that draw people to the mountains.
Remember that your body will probably be aching and bruised from the crazy adventure you just had. Take things easy for a few days, giving your body time to recover before you take on anything hectic. After all, you only get one body, so you should treat it with care.
Conclusion
Mountaineering is incredibly rewarding. Standing on the summit after an incredible journey is a feeling that words can’t describe. Proper preparation and training get you halfway there.
On the mountain, you’ll have to focus on technique, hygiene and safety while drinking in the breathtaking views you’re likely to see. Nothing feels as free as watching the sunrise over the distant ridge, just to be standing on that same ridge a few hours (or days) later.
I hope that you found this guide to be informative and helpful. Happy adventures!

Written by Felix
About me
Hi! I’m Felix. When I’m not spending time out in the mountains, I like to write about my hobbies. That is how Mountain Homies was created. On this site, I try to gather all the juicy information about Mountaineering that I have learned since I started. Happy adventures!
Related Articles

3 Ways to Spot and Reveal a Crevasse (And Avoid It)
So, how do you spot a crevasse and – more importantly – avoid falling into one? In this article, I will have a look at what crevasses are and how to detect them…
5 Ways of Knowing If Your Climbing Shoes Are Too Big
It has almost become a prestige among climbers to be able to boast about how small and tight climbing shoes can be used. There is therefore a lot of talk…
3 Clever Ways of Crossing A Crevasse
When you’re mountaineering in snow country, you will undoubtedly encounter some crevasses. These are scary, since you don’t always spot them…
Stay Up to Date With The Latest News & Updates
Join Our Newsletter
The owner of this site is a participant in the Amazon Services LLC Associates Program, an affiliate advertising program designed to provide a means for sites to earn advertising fees by advertising and linking to amazon.com.