You’ve done some basic climbs and treks and the bug has bitten. You want to do some serious mountaineering and you’ve seen that the correct gear is critical (trust me I’ve been there). Let me walk you through what I learned while climbing up the ranks.
In short, I would primarily be looking at more expensive mountaineering boots for technical climbs where you might want extra stability, crampons and protection. Hiking boots can go a long way though if they are the right fit and the climb is not too demanding in terms of slope and technicality.
It’s not always so easy to choose these shoes, though. Specific types of routes need specific types of boots. Also, your climbing style would influence which shoes you use and how you’ll want them to fit. Added to that, the boots need to be suited to the environment you’ll be climbing in.
In this article, I’ll take a look at how to choose mountaineering boots that fits your specific needs.
Contents
Fit of Mountaineering Shoes
Everyone’s feet are different. Your boot has to fit your foot, not the store’s test dummy. Regardless of the cool features that a boot may have, you have to make sure that the fit suits your feet and walking style.
Value Differences
Boots are expensive. You’ll have to weigh up cost versus performance in order to decide which boot to choose.
Before heading to the store, think carefully about the types of routes you’ll be facing, the budget you have for boots and the performance aspects that you find critical in your footwear.
Boot Sizing
Sizing your mountaineering boot depends on performance and warmth along with specific features of the boot.
A boot that fits too tightly will inhibit circulation to your toes, inhibit movement of your toes and cause you to get cold. Another disadvantage is that, when you’re kicking into ice, crags and whatever else, your toe will bang into the front of your boot, causing minor discomfort or, in severe cases, costing you a toenail.
Experts recommend that your toe should be able to wiggle around in your boot about a third as much as you’d be able to do barefoot.
Try your boots on in-store before buying them. Take a single mid-weight wool sock for this exercise rather than a combination of socks – preferably use the socks that you’re planning to use in the mountains.
Your feet swell while hiking, so, if possible, try on the boots late in the day, when your feet are likely to be slightly swollen from the day’s activities. Once you’ve laced up the boots, kick into something solid as if you’re kicking crampons points into ice. Your toe should not bump into the front end of the boot – if it does, try a bigger size.
Next, you should try to stand on a small ledge with the toe of the boot – simulating what you would experience while standing on front points. Your heel is likely to lift up slightly in the back of the boot. A little bit of this is okay, but a lot of heel lift will negatively affect your climbing ability.
Try to find a balance between this heel lift and the amount of wiggle room for your toes.
Try a different brand as well, since different manufacturers have different heel cups, which might solve your problem.
Different Styles Of Mountaineering Boots
The main types of mountaineering boots are:
-
Single Boots (Lightweight or Heavyweight)
-
Plastic Double Boots
-
Hybrid Boots or Synthetic Double Boots
-
8000 meter Boots
You get mountaineering boots in various styles. Some are lightweight or single boots, having the entire boot in one piece. Super gaiter boots incorporate the gaiter into the boot, while double boots have removable inner parts.
Each of these has specific pros and cons, ranging from stiffness, suitability for technical routes and comfort. This will be discussed in more detail in the sections below.
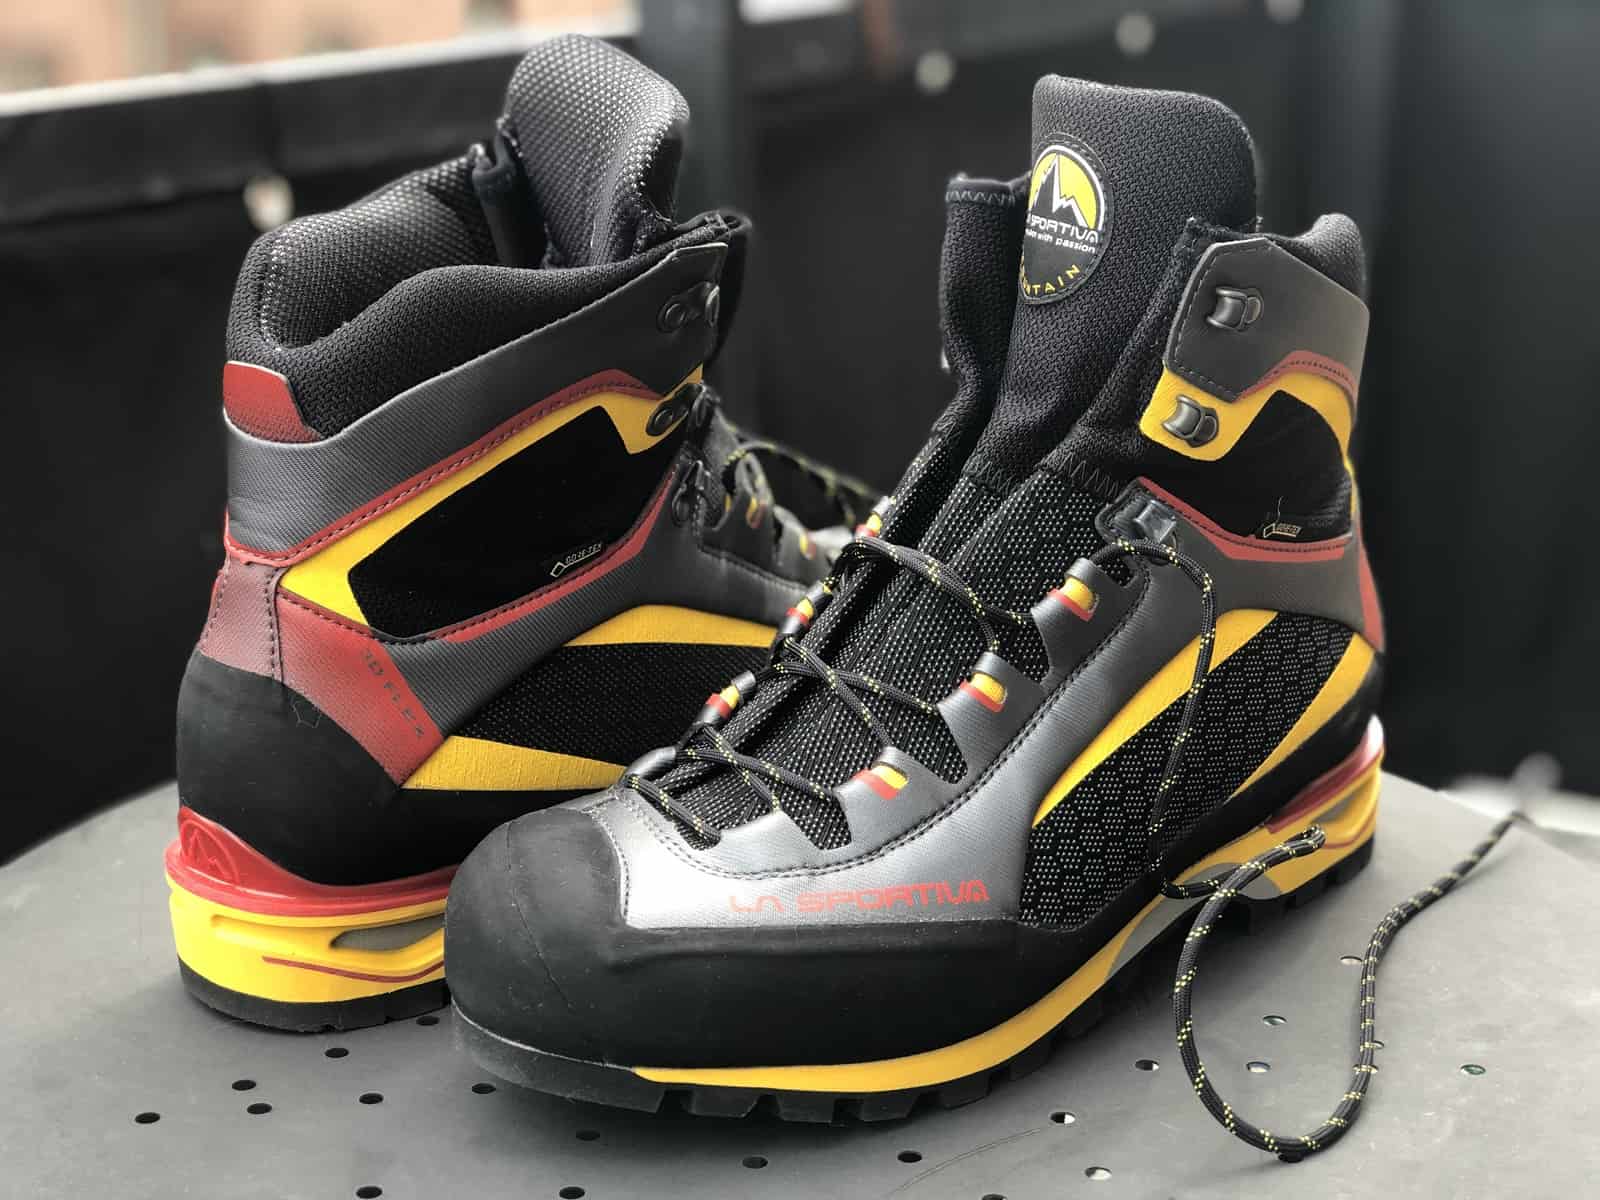
The La Sportiva Trango Tower GTX has been my go-to single heavy boot for the last year. I will probably write a review later.
Single Mountaineering Boots
Single mountaineering boots are perhaps the most versatile and the most common type of boot that you will encounter.
Pros
- Versatile – Can tackle many types of mountains/terrain
- Rather comfortable to walk in – Can often be used for hiking
- Lightweight – Comfortable for long hikes
- Less expensive – Offers the most climbing/hiking options for the dollars spent
- Good for climbing and hiking in the summer – The boots offer good ankle protection which makes them a comfortable option even during hot summer climbs
- Breathable – A nice touch for warmer and/or longer hikes
- Good for mixed dry and snow conditions
Cons
- Can be cold during winter or high altitude climbs
- More lightweight boots are not compatible and/or preferable with all crampon types
- Not preferred for wet conditions – Some boots take a long time to dry
Mountains that are good for Single Boots
- The Alps in the summer
- Elbrus (summer conditions)
- Mexican Volcanoes
- Kilimanjaro
- Ecuador Volcanoes
The Best Materials for Mountaineering Boots
There are various types of materials from which climbing boots are manufactured. Each of these has specific pros and cons.
Plastic Upper – Good for Crampons
Boots with a plastic upper have a hard outer shell, while inside they usually have a removable synthetic boot. If you’re on an Alpine climb, this model is great, since you can remove the inner boot at night in order to let it dry out.
The outer boot is waterproof, so your feet will be protected from melting snow, water in rivers, streams and glacial pools. The inner boot will get wet from sweat, though. Yes, anyone who’s ever done a proper trek will know that your feet will sweat, regardless of the weather.
These bots are the warmest of all your options. If you’re headed for higher peaks above 8000 meters, you can invest in the more expensive knee-high gaiters that often come with the plastic boots.
Plastic boots are stiff, so they’re great for attaching crampons to. Here, you can pull the straps of strap-on crampons extremely tight. If you do that with softer boots, you could affect the circulation to your feet, which would seriously suck.
You can use plastic boots on ice and mixed crags too, but they’re not as good as the more flexible leather or synthetic boots.
Synthetic – Not for Ice
Climbing boots with synthetic or partially synthetic uppers are commonplace. These boots are lightweight and more comfortable than the traditional all-leather alternative. They also have a shorter break-in time, sparing your feet some misery in the process.
These boots have some distinct disadvantages, though. They’re softer, so they offer less support in steep ice. They’re also often less durable than leather, so you’ll have to replace them more often. That said, these boots are still pretty tough and you won’t wear them out super quickly.
On the upside, the designs for synthetic boots are continuously getting better. Each season, there’s a new boot out with a better blend of stiff plastic and soft synthetic material, improving the comfort and durability of these boots.
Leather – A solid choice
Leather boots have been around for ages and ages and they’re still the best out there. Most important climbs have been done by people using leather boots. These boots are tough, stiff and solid, able to withstand the beating meted out by harsh ice, rock and snow. They’re still comfortable enough to hike in for the entire day, which is a definite plus.
Here are some things to look out for when choosing leather mountaineering boots:
-
Ankle support – the upper must be high enough to wrap around your ankles, a lug sole, toe and heel welts.
-
Also watch out for a stiff shank, since this will help you with frontpointing along with a hard toe and heel to protect your feet when you’re taking kick and plunge steps.
Since leather boots are often suitable for climbing technical rock – they’re lightweight – make sure that yours fit snugly for wedging. If they don’t, you won’t be able to take on technical rock in your leather boots.
Stiffness
The route you want to take on determines the stiffness of the boot you need. A highly technical route would require a stiffer boot, while flexible boots are more suited to glacial exploring.
Rigid – For technical routes
These boots are for technical ice routes. Here, you would choose a plastic or extremely rigid leather boot. Imagine balancing your entire weight on two front points that you shoved into an inch of flow ice. Here, a rigid boot would give you some much needed support, giving your calves a rest.
On the downside, hiking in super stiff boots aren’t that much fun. You’ll have to learn how to heel-toe with these until you get to the technical areas of the climb.
Medium Flex
These are more comfortable than the rigid boots, while still offering some support on technical areas of the route. You would use medium flex boots on less demanding snow and ice routes.
Medium flex boots are often leather of synthetic. They have a firm sole and provide ankle support – this is critical.
You’ll be able to use these boots on alpine rock climbs, where you have to jam your toes into cracks, but you’ll be less effective than with purpose-specific boots.
Flexible – For Hiking
Flexible boots are more suited for hiking. Here, you’d be trudging through snow and ice, streams and talus.
You won’t be able to take on technical routes with flexible boots, but your feet will thank you for the comfort you’ll experience while hiking.
Use flexible boots for easy approaches and pair them with flexible crampons.
Since flexible boots are usually much lighter than the alternatives, you’ll be able to hike much faster, reaching your destination before nightfall.
Crampons
Your boots need to be compatible with your crampons.
Always check your crampons with your boots before you buy anything – they’re not universal, as is the case with ski bindings.
If your crampons are not compatible with your boots, they might pop off under the pressure of frontpointing. Not ideal.
Some manufacturers offer crampons with hybrid bindings – a mixture of straps and bails.
These aren’t meant for highly technical routes, but rather for snow mountaineering and glacier travel. The reason for this is that the crampons with the hybrid bindings won’t fir as snugly as the alternative, so you’re likely to experience some wobble.
These crampons can also be used with a more flexible boot that doesn’t have a grooved toe welt.
You’ll see that technical boots have a deep toe and heel grove. This is for securing step-in crampons with a toe bail and heal bail with tensioning lever.
Gaiters
Highly technical boots that you would use at extreme altitudes often have integrated gaiters.
This saves weight and offers better weather protection, since there’s no potential gap between the gaiter and the boot. Water and snow won’t affect you as much in these boots.
The downside is that you need proper maintenance (mostly oiling and cleaning) of the zipper, since this can easily break at the low temperatures that you’re likely to face. If your zipper goes at home, you’ll have to get some expensive repair work done.
If you’re unlucky enough to have this happen while in the mountains, you might be in trouble.
Gaiters are also expensive, so you really need to make sure that you’re getting the right ones.
Conclusion
Different boots are made for different purposes, having different materials, fits and price tags.
Decide on the features you need and the ones you can live without then find a pair of boots within your budget. Happy adventures!

Written by Felix

About me
Hi! I’m Felix. When I’m not spending time out in the mountains, I like to write about my hobbies. That is how Mountain Homies was created. On this site, I try to gather all the juicy information about Mountaineering that I have learned since I started. Happy adventures!
Related Articles

3 Ways to Spot and Reveal a Crevasse (And Avoid It)
So, how do you spot a crevasse and – more importantly – avoid falling into one? In this article, I will have a look at what crevasses are and how to detect them…
5 Ways of Knowing If Your Climbing Shoes Are Too Big
It has almost become a prestige among climbers to be able to boast about how small and tight climbing shoes can be used. There is therefore a lot of talk…

3 Clever Ways of Crossing A Crevasse
When you’re mountaineering in snow country, you will undoubtedly encounter some crevasses. These are scary, since you don’t always spot them…
