
I have for a long time tried to answer questions regarding ice climbing separately in different post. Finally, I came to the realization that I might as well gather everything in one big post.
So that being said, this quick guide is the cumulative of everything I believe an ice climbing beginner should learn to tackle the ice.
Ice climbing is a subsection of mountaineering that is incredibly challenging. Preferably you are not a first time mountaineer/climber if you consider learning ice climbing.
Some skills are transferable between ice and rock climbing, so if you have some rock climbing experience, it’s an advantage when you start out on the ice. Ice climbing is a skillset you will probably need on some alpine treks.
In this beginner guide, I will take you through all the basics of ice climbing that you need to know before heading out.
Contents
Introduction to Ice Climbing
So, what is ice climbing anyway? Basically, it’s climbing up an icy face using ice axes, picks, crampons and ropes, among other equipment.
In the past, ice climbing was seen as one of the aspects of alpine mountaineering. Here, ice faces were an obstacle to cross in order to get to the summit, much like rock climbing used to be a part of hot weather mountaineering.
Recently, though, adrenaline junkies and other outdoor enthusiasts went looking for ice faces for the pure thrill of climbing it, not just to reach the summit, and there we have it, a whole new sport was born!
Ice climbing is an extreme sport, since you’re outdoors in sub-zero conditions for long stints and you’d often be exposed to foul weather, avalanches and crevasses.
Where Do You Climb?
In short, glaciers and frozen waterfalls. You can do mixed climbing as well, which involves traversing ice, rock and snow (extreme!).
Ice climbing obviously only happens in cold regions or at high altitudes, since you won’t find ice hard enough to climb in any other regions.
If you are looking for tips on how to traverse glaciers I suggest that you check out the beginner guide on glacial traversing that I wrote not long ago. It sums up everything you should know about crossing glaciers. You can find that article here.
Do You Need A Team?
Ice climbing happens in pairs – one person climbs while the other belays. The belayer is the anchor, keeping the climber from falling off the ice by holding the other end of the rope.
We’ll get to the details of belaying in a later section.

Route Grading
Routes are graded to indicate how difficult they are. Each route has an objective and technical grade.
Grading in the UK
In the UK, they use a Roman numeral to indicate how difficult the route is overall, while a number is used to show how hard the most difficult moves on the route are, so a route with and overall difficulty of 5 and a hardest move of 5 will be graded “V5”.
Remember that this grading is just an indication – sometimes, a route with a low grading feels super hard, just because the conditions under which you’re climbing isn’t that great.
This could mean that the weather turned super extreme, or the route is very exposed, or you’re stressed. It could also be that it’s the first route you’re lead climbing when you’re used to top-roping, or one of a whole host of other reasons.
Your technique also plays a role. If you’re doing all the work with your arms, you’ll get tired quickly, while working with your feet as well and conserving energy in the way you climb, will make climbing so much easier and make you last much longer.
American Grading system
The American grading system is a bit different from the UK one. Here, routes are divided into three categories: water ice (WI), alpine ice (AI) and mixed ice (MI).
Since ice climbing routes change from year to year (because ice melts and new ice forms), these grades don’t really indicate the difficulty of the route, but rather the steepness of the route.
Water ice disappears in the warmer months, so it’s seasonal. Here, an easy route that’s not very steep is indicated by WI1, while a vertical or overhanging route that’s probably very dangerous, is indicated by WI17.
Alpine ice is found at high altitudes and in glaciers and is permanent. This is graded in the same way as water ice, except that the prefix changes from WI to AI.
Mixed ice routes could contain rock along with the ice. Here, the grading system is similar to the Yosemite Decimal System (YDS). Mixed ice is graded from MI1 to MI13 and is also described in terms of the YDS. Here, a M1 route would be similar to a 5.5 rating on the YDS.
Ice Climbing Jargon
Ice climbing has its own lingo. Here are some of the more common things you’ll hear while outside:
- Adze: the part of your ice axe blade that looks a bit like a shovel. It’s used to chip away loose ice.
- Bollard: this is a big piece or rock, ice or snow that can be used as a belay anchor.
- Couloir: a steep gully or gorge, often filled with snow or ice
- Dry tooling: if you’re using your ice climbing gear (ice axes or crampons) to climb the rocky sections of mixed routes.
- French technique: aka flat-footing. Walking in such a way that everything except the front parts of your crampons are in contact with the ice. Usually done on low-angled ice.
- German technique: aka front-footing. Kicking into the ice with your feet so that only the front bits of your crampons are in contact with the ice. Usually done on steep slopes.
- Neve: permanent granular ice. This forms through successive freeze-thaw cycles.
- Piton: piece of equipment knocked into the ice with the hammer of your ice tool. Not used as much as ice screws.
- V-thread: an anchor made from two ice screws used in a v-formation.
- Verglas: thin layer of ice on rock, formed by rain water or snow freezing on the rock. This is hard to climb, because it’s so thin.
Ice Climbing Basics
Let’s take a look at the basics: gear and technique.
Gear for Ice
In order to be successful at ice climbing, you need to protect yourself from the elements and you need the right gear to get up the ice in the first place. Here’s a list of stuff you’ll need:
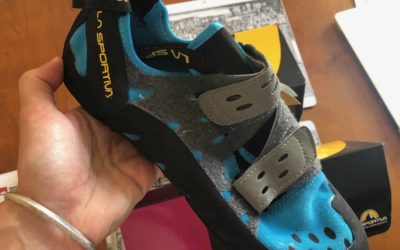
- Insulated ice climbing boots
- Climbing harness
- Climbing helmet
- Crampons – not your normal mountaineering crampons
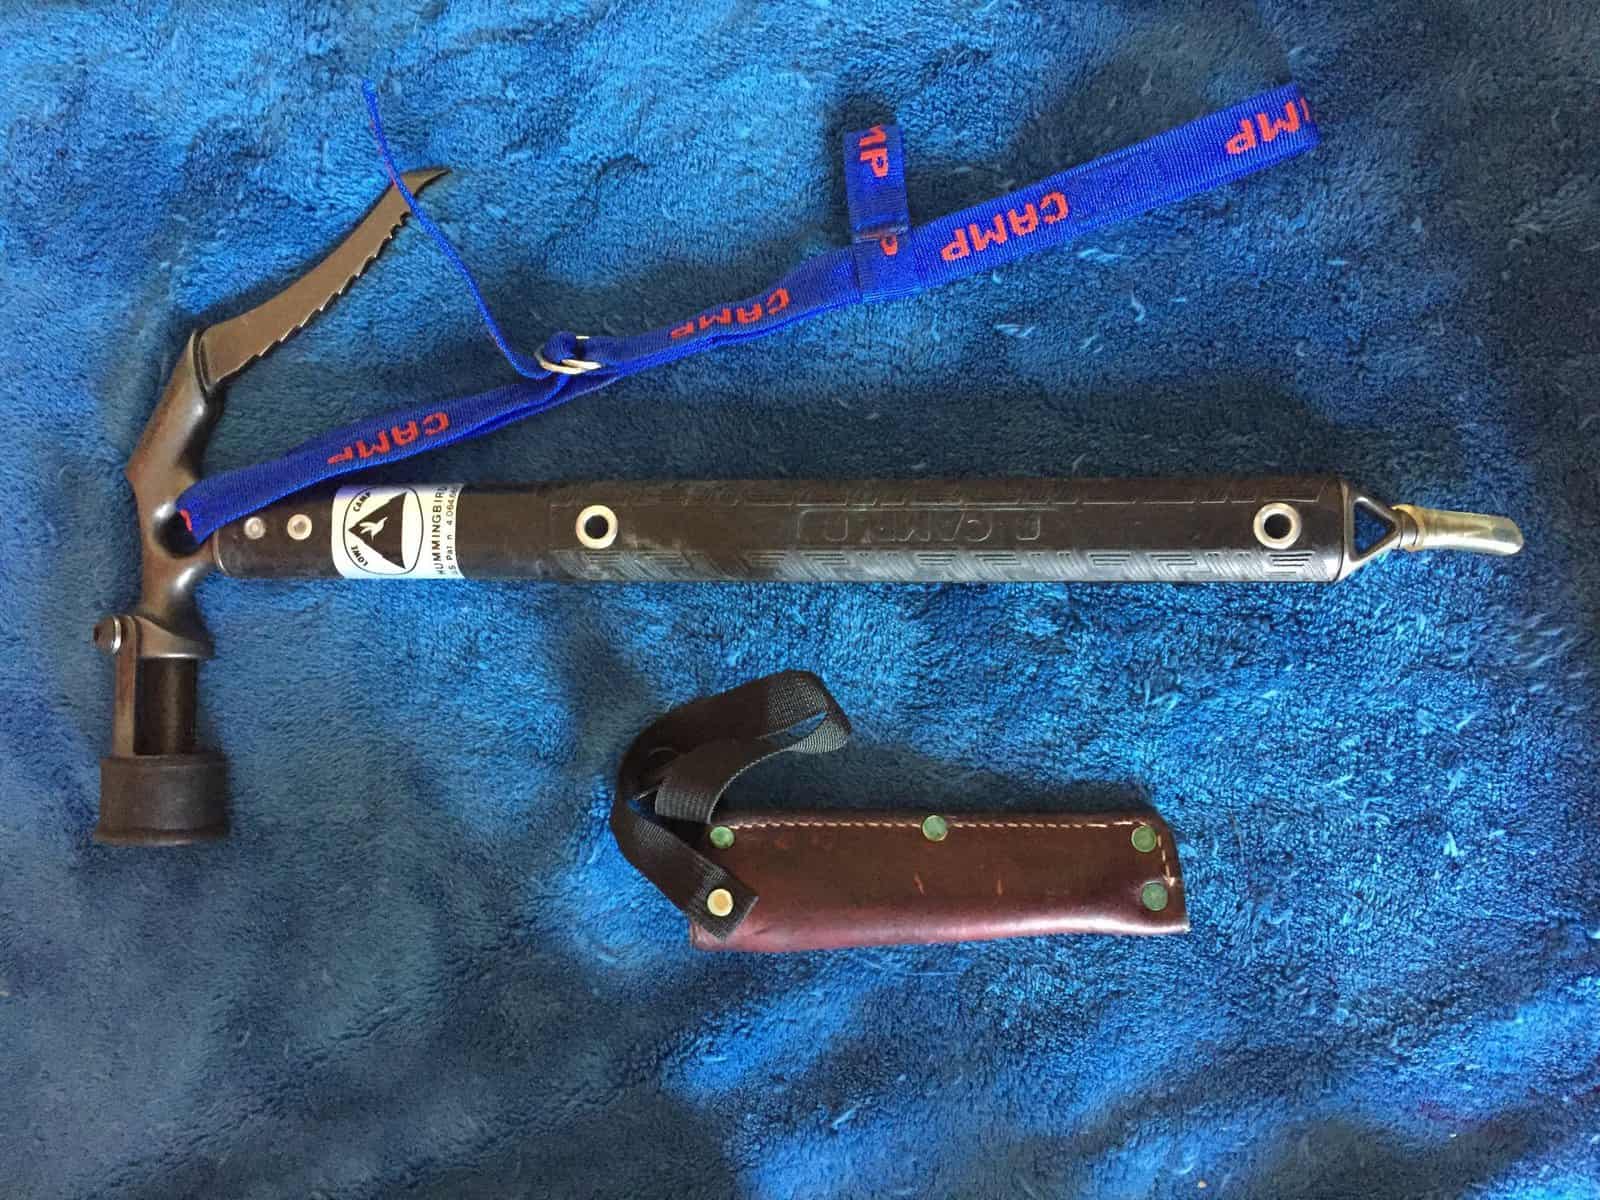
- Ice axes
- Leashes for your axes – this isn’t essential, but prevents your axes from taking a tumble
- Belay device
- Carabiners
- Ice screws – trad gear for ice climbing
- Rope
- Quickdraws
- Gloves – several pairs, allowing you to wear different ones for climbing, belaying and hiking. It helps having a dry pair for the hike out.
- Eye protection (some choose to go without)
- Sunscreen & sunglasses
When you’re just starting out, this is a crazy list of stuff to get and will come with a steep price tag. It’s best to go with friends who already have the gear in order to check things out, or go with a guide, who would probably let you rent the equipment.
Once you decide that you really like this sport, invest in gear as you go along.
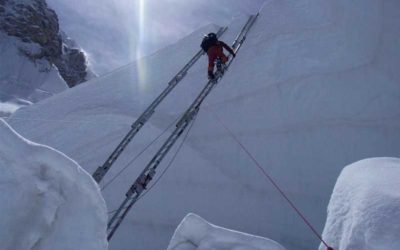
Where Does the Rope Go?
There are two ways of attaching your rope when you’re doing a route: anchors at the top of a climb, or lead climbing while placing anchors.
If you can get to a route from the top, usually by hiking around to the top, it’s possible to place anchors that would allow a top-rope system to be set up. If this isn’t possible, a lead climber would have to set up the route, placing anchors as they go, eventually setting up a top rope for less experienced climbers.
While lead climbing, ice screws are placed along the route instead of the trad gear used by rock climbers.
Ice Climbing Technique
As with most sports, you want to use your energy wisely. It’s not a good idea to use all your energy on the first two moves of a route, getting pumped and being unable to continue.
Here, you want to maximize the number of moves you do per axe placement.
Ice Axe technique tips
Use your body in order to maximize the power with which you place your axe – open your shoulder in order to have more space when you strike.
Also, if one arm gets tired, switch hands in order to strike with your stronger arm.
Ice axes are designed to allow easy switching, so use it when you need it. Switching is also a useful technique when you’re traversing a section of ice, since your lateral movement will be more effective in this way.
It helps to place your gear well. When you’re placing your axe, be as accurate as possible. This means that you only have to swing once in order to place your axe, conserving energy. Swing from your elbow, flicking your wrist at the end of the swing to place your axe firmly and securely.
For proper grip, you only need about a centimetre or two of your axe blade to go into the ice. If you swing too hard, your axe will go deeper. This means that you’ll have to work harder to get it out again and you’ll damage the ice, making it harder for the next person to climb that route.
Don’t do this with your feet
When moving your feet, the same principle applies. You only need a centimetre or two of your crampon tips to be in the ice.
Take a small step, kick in with your feet and stand up. If you wiggle your feet too much, you’ll damage the ice, dislodge your feet and you’ll probably fall. So, do only what you need to. Don’t work too hard.
You’ll quickly get the hang of reading the ice. Here, you want to check for bulges and variations that will act as footholds or somewhere to plant axes or hooks.
Sometimes, other climbers have left hooks in the ice, which you can use. Then, of course, there’s a “neve”. This is a type of ice created by successive freeze-thaw cycles, ideal for placing an axe, but typically useless for placing ice screws.
Rest positions – your best friends
An essential part of any form of climbing is the effective use of rest positions. Find a way to place your feet and lean your body into the ice so that your arms are free, allowing you to shake them out. This gives you that much needed breather to be able to get going again.
It’s best to learn proper technique and safety precautions from an experienced guide. Book a course with a reputable climbing school before you head out in your own.
Safety for Ice Climbing
Ice climbing is an extreme sport, so you need to take safety seriously if you want to live to tell of your adventures.
Get a Guide
Local guides know the area and will know exactly what to do in an emergency. These guys are also well trained and will take the necessary precautions – factors that you might forget and neglect just because you’re new to things.
Care for weather signs
You’re going to be outside in sub-zero conditions for a long time, so you’ll need to be properly prepared. Keep an eye on the weather, since mountain weather is incredibly unpredictable.
If it looks like things are turning foul, take shelter or get out of there, whichever is safest at that moment in time.
Protective Gear is key
Wear a helmet. Like, seriously. If you bang your head really hard or if a piece of ice falls on your head, you could have a mild concussion or end up in the morgue. Also make sure that you use the necessary protective equipment, like gloves and insulated boots.
If you’re belaying, your partner will almost definitely dislodge some ice, which will fall on your head. So, it really is important to wear a helmet.
Take into account that you’re climbing with ice axes and crampons. If any of these are used incorrectly, you could chop into your arm or leg, causing serious injuries.
You could also end up slicing through your rope, leaving you stranded way up on the ice with no way down. Ice climbing equipment isn’t toys, so you need to treat them with respect in order to use them well.
Be aware of this all the time
Ice is a non-permanent structure. This means that pieces of it will come off or move, usually at weird times when you’re not expecting it. When you’re out climbing, always be alert and aware of what’s happening around you.
When you’re not climbing, stand away from the base of the route and out of the fall zone. This will get you out of harm’s way if pieces of ice or gear come crashing down.
Know where the ropes are at all times. This would help you avoid damaging them with your gear or standing on them when you’re not climbing. Your rope is your most important safety tool, so it’s extremely important to protect it and treat it well.
Communication rules
For every climbing excursion, clear rules of communication should be set up. This would allow everyone to know what to do when something falls from the route (large pieces of ice, tools, or whatever), and would also make communication between climber and belayer easier and clearer.
For example, if a large piece of ice chips off the route, the climber would yell “ice!” as loudly as they can. Everyone below would know to duck, preventing injuries. If anything else falls, you can yell the same word, since everyone would still duck, which is the appropriate response.
Conclusion
Ice climbing is an exhilarating extreme sport that’s well worth a try. It’s also a dangerous sport, so it’s important to keep safety at the forefront while you’re out and about.
If you want to get into ice climbing, get a guide and proper instruction in order to get started. Work your way up from easy routes to more challenging ones and enjoy the awesomeness of the extreme outdoors while you’re at it. We know you’ll come running back for more as often as you can. Happy adventures!

Written by Felix
About me
Hi! I’m Felix. When I’m not spending time out in the mountains, I like to write about my hobbies. That is how Mountain Homies was created. On this site, I try to gather all the juicy information about Mountaineering that I have learned since I started. Happy adventures!
Related Articles

3 Ways to Spot and Reveal a Crevasse (And Avoid It)
So, how do you spot a crevasse and – more importantly – avoid falling into one? In this article, I will have a look at what crevasses are and how to detect them…
5 Ways of Knowing If Your Climbing Shoes Are Too Big
It has almost become a prestige among climbers to be able to boast about how small and tight climbing shoes can be used. There is therefore a lot of talk…
3 Clever Ways of Crossing A Crevasse
When you’re mountaineering in snow country, you will undoubtedly encounter some crevasses. These are scary, since you don’t always spot them…
Stay Up to Date With The Latest News & Updates
Join Our Newsletter
The owner of this site is a participant in the Amazon Services LLC Associates Program, an affiliate advertising program designed to provide a means for sites to earn advertising fees by advertising and linking to amazon.com.
